Claude code/Codex+Seedance AI Video: The Full Process from an Idea to a Finished Film
文章目录
This article solves only one problem: how to rely on a multi-model workflow and the things to watch out for during actual operation to make an AI video you are satisfied with, using as little money as possible and as low a re-roll rate as possible.
A few days ago I published a post that briefly shared which AIs I use to make videos, namely Claude code, Codex, and Seedance.
But actually I think knowing how to use the tools is actually not the hardest part; on the contrary, it may even be the simplest.
From starting with an idea to making a film, you will run into a great many problems along the way, for example: coordination between models, plot conception, frame composition, camera placement, camera movement, how to write prompts, video re-rolls, and a whole series of other problems.
And I have actually run into all of these problems, and I have also summarized these things and written them into this article, so almost the vast majority of problems you run into in video production should be answerable from this article!
The article is divided into 2 parts, one is the tool level and one is the practical operation level. The main content is the second part: starting from an idea and then step by step making a complete film, with complete prompts given.
I. Tool Layer: Let Claude Be the Chief Director, and I Only Communicate with It
I use 3 models in total, Claude code, Codex, and Seedance, plus two tools: ffmpeg and Python.
The division of labor between the models is all different. The most important one is Claude code, it is the chief director, and the other 2 are both connected to Claude, and you just let Claude call them.
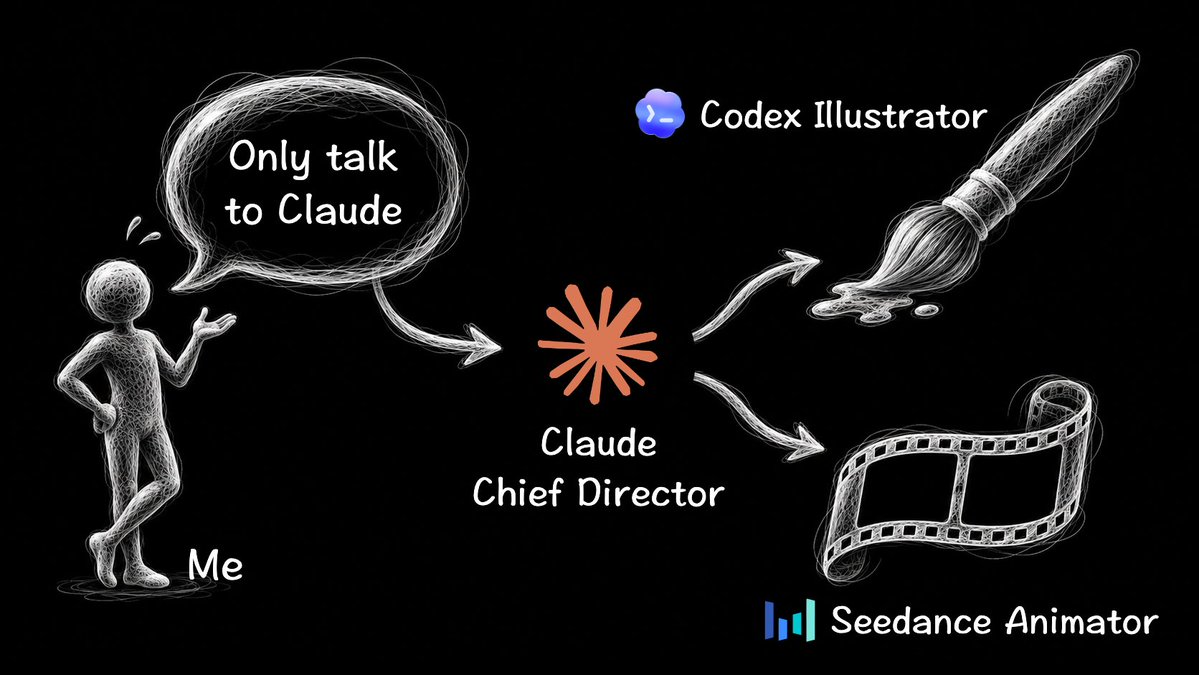
One benefit of setting it up this way is that throughout the whole process I only need to communicate with Claude, with no need to switch windows or copy and paste everywhere. It's very hassle-free, and the efficiency is very high.
If you don't have Claude for now, using Codex is also fine. It's just that I feel Claude is a bit smarter and then its taste is a bit higher, but Codex can do all the actual work.
Then there's how to connect Seedance and Codex to Claude Code. It's very simple. If your computer already has Claude and Codex installed, you just tell Claude directly to call Codex to generate the images. And for Seedance, go to Volcano Engine and register an account, then apply for an API key, then let Claude write the scripts that need to be written by itself, fill in the Key as it asks, and that's it. It will handle the rest for you.
The division of labor of each model can be seen in this table:
| Role | Responsible for |
|---|---|
| Me | Choose the direction, confirm the art style, approve spending; watch the motion, listen to the sound |
| Claude (Director) | Write the story and storyboard, write all prompts, check every image and every video clip, write code for post-production |
| Codex (Illustrator) | Draw design sheets, sample frames, and the first and last frames of every shot |
| Seedance (Animator) | Turn the first and last frames into a few seconds of video |
An important principle of this design is:
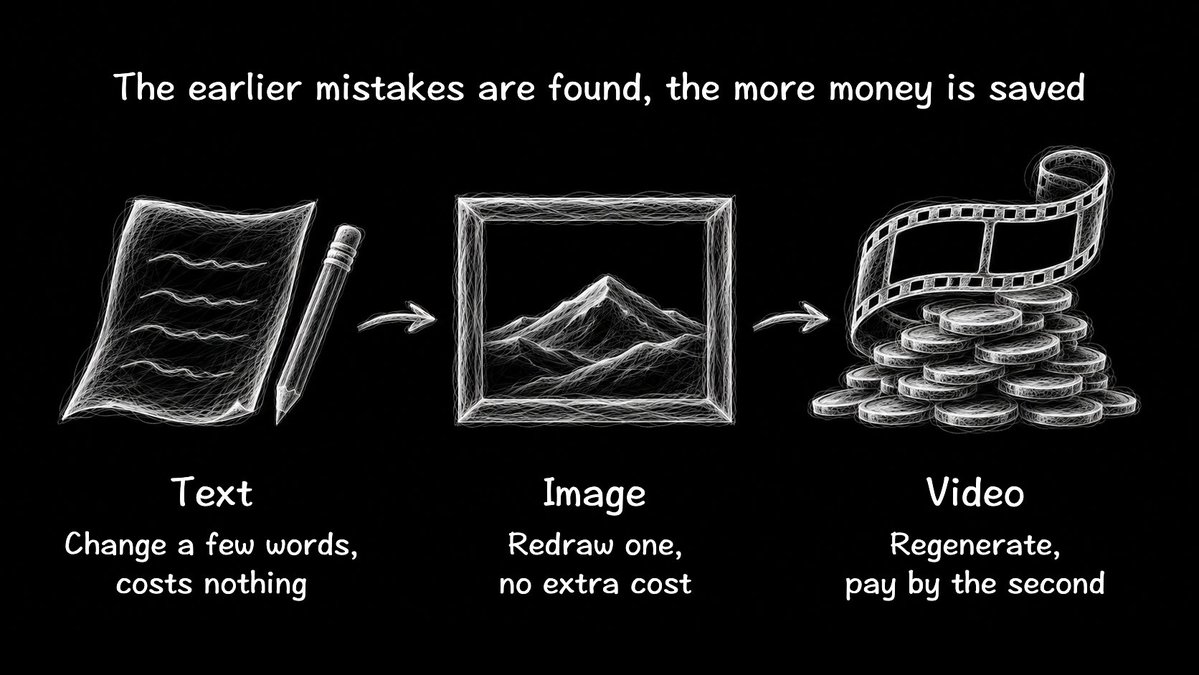
Changing a prompt only takes changing a few words, and redrawing an image doesn't cost extra either, but regenerating a video is paid by the second (everyone knows how expensive Seedance is, right!).
So mistakes that can be found in the text, don't leave them for the image.
Mistakes that can be found in the image, don't leave them for the video.
I wrote this collaboration mode into a complete prompt. Before making a video, just send this to Claude/codex first:
You are the chief director of this short film, responsible for the whole process, and I only communicate with you.
Before starting, do two things first:
1. Ask me: film length, aspect ratio, total budget, whether to add music and subtitles.
2. Check whether Codex, ffmpeg, Python, and ARK_API_KEY are usable, and tell me what's missing.

Remember to put all files in a new project folder.

Division of labor:
- You: write the story and storyboard, write all prompts, call the other models, extract frames and zoom in to check every image and every video clip, and write code with ffmpeg and Python for post-production.
- Codex (Illustrator): draws design sheets, sample frames, and the first and last frames of every shot. You don't draw yourself.

If you are Codex, use your own image generation tool.

- Seedance (Animator): turns the first and last frames into a few seconds of video.

- Me: choose the direction, confirm the art style, approve spending, watch the motion, listen to the sound.

Calling Codex:
codex exec --skip-git-repo-check -s read-only -i reference.png - < prompt.txt
At the start of the prompt write: Use your image generation tool to create exactly ONE image. Do not run shell commands.
Finished images are in ~/.codex/generated_images/<session id from the log>/.

Calling Seedance:
POST https://ark.cn-beijing.volces.com/api/v3/contents/generations/tasks
The key is in the environment variable ARK_API_KEY; don't print it out. For the request format, check the Volcano Ark documentation.
For the model choose doubao-seedance-2-5-260628 (720p about ¥1.5/second) or doubao-seedance-2-0-mini-260615 (720p about ¥0.5/second); the bill is the final word on price.

Overall principle: stop mistakes before money is spent. Mistakes that can be found in the text are not left for the image; mistakes that can be found in the image are not left for the video.

Rules:
1. Before I confirm the story, don't draw any images.
2. Before I confirm the art style, don't draw the official shots.
3. Before submitting for video generation, open another agent to review every detail of the prompt and the images; it only finds mistakes and doesn't change files. After it passes, give me a quote, and only submit once I agree.
4. If a video has a problem, first think about whether it can be fixed with code; only reshoot if it can't be fixed, and only shoot this one shot.
5. Save new versions as new files; don't overwrite or delete old files.
6. You can't see the real motion, and you can't hear the sound either. Things you haven't seen or heard, you must tell me clearly.
7. Don't top up, don't buy credits. If the API returns an out-of-funds error, stop, and first make a rough cut of the existing clips for me to watch.
II. The Full Process from an Idea to a Complete Video
1. From an Idea to a Complete Plot
First of all, well, if you want to make a video, you yourself must have an idea, that is, roughly what kind of story this is, roughly what the plot is and so on. Then you tell this idea or this initial plot to the AI, it doesn't need to be too detailed, and then you chat with the AI and let it help you refine the plot, until the complete plot and story line are finalized.
Then I think a complete good story actually has standards, and it needs to meet at least the following requirements:
1.1. The story must follow real-world logic
After the first draft of the story is written, every twist should be questioned once against reality: Why would this happen? Where does the thing come from? Can it be reached? Would this really happen in reality? Unless the video you're making doesn't need to consider real-world logic in the first place.
1.2. Be able to say clearly in one sentence what you want to express
After writing, ask yourself: What exactly does this film want to say? Which parts of the plot are designed best? If you can't even say it yourself, then this film's plot is very likely flat, and in this case, revise it some more.
1.3. The opening must grab people
Nowadays when we watch a video, we might swipe away directly after watching just a few seconds, so the most eye-catching picture should be put at the front.
1.4. The reactions of bystanders must be like real people
This is actually a very important point. I suggest that every gag or twist in the plot be written in 3 parts: problem → how the protagonist solves it → how the bystanders react.
What needs special attention is that the reactions must come in sequence. Something like several people raising their hands in the same second is obviously made by a model at a glance. In the real world it's impossible for several people to raise their hands at the same time; it's very unrealistic.
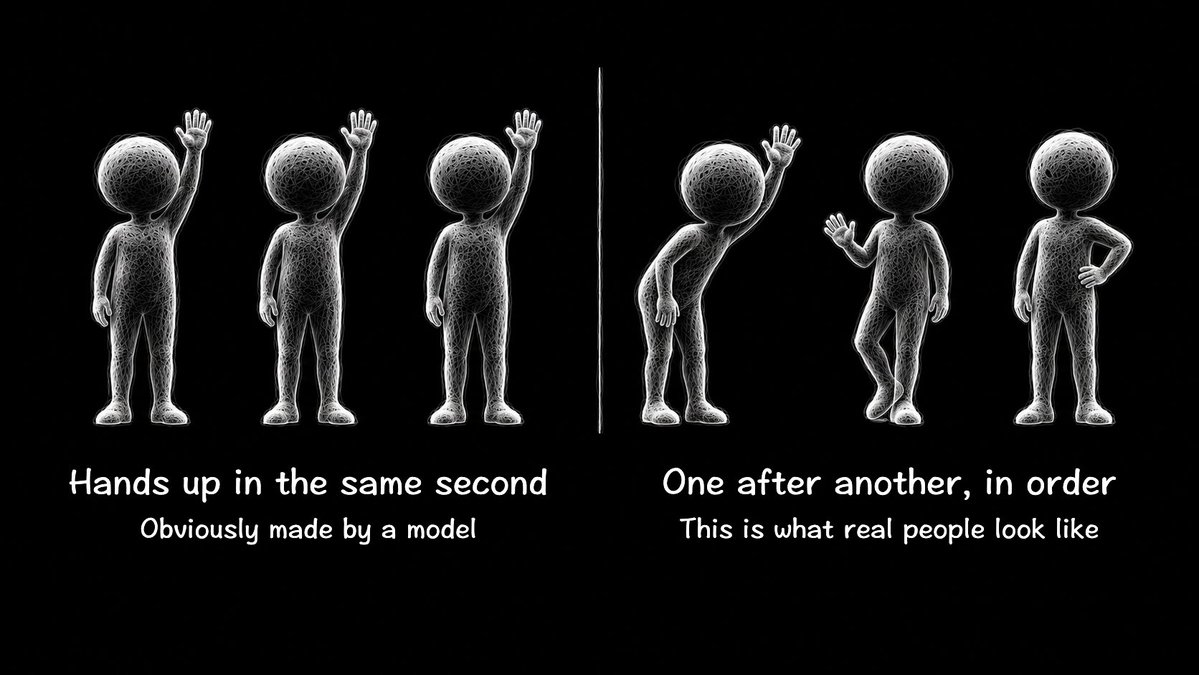
There are also some details to pay attention to, such as a real person's body shrinking back when surprised, that kind of thing.
1.5. The plot pictures you design must be something AI can shoot, or can shoot easily.
AI video has some fixed weaknesses, for example: characters crossing each other, hands holding small objects, text, mirrors and reflections, left-right asymmetric features, changing light within one shot, one person doing three actions in a row, top-down shots where the face can't be seen, too many supporting characters. These pictures are all very likely to need re-rolls, which means they're hard to get right in one go, so these should be avoided as much as possible right at the first step when writing the story.
Another thing is that the story structure also needs consideration. The first choice is the segmented structure, which is the most stable, because the shots don't need continuity with each other. And a continuous plot structure like this feels like the easiest to have continuity errors, and it also needs more attention to the connections between each segment.
Likewise I've organized it into a prompt; send it directly to the AI:
The film I want to make: [one sentence, or my initial plot]. Film length: [seconds].
Song: [song title, length, BPM; delete if no song].
Reference film: [write it if there is one, delete if not].

First help me refine this idea into a complete story. If anything is unclear, ask me, we'll talk it through together, and wait until I confirm before writing further.
For story structure, the first choice is segmented, because the shots don't need continuity with each other; it's the most stable. Continuous is the easiest to have continuity errors; unless I ask for it, don't use it.

Once the story is settled, expand it into a shot-by-shot story that meets the following requirements:
1. Follows real-world logic. Question every twist once against reality: Why would this happen? Where does the thing come from? Can it be reached? Would this really happen in reality?
2. Can say clearly in one sentence what it wants to express. Write this sentence out first; if you can't say it, it means the story still needs revising.
3. The opening must grab people. Put the most eye-catching picture at the front, and write clearly what appears at which second.
4. The reactions of bystanders must be like real people. Write every gag or twist in 3 parts: problem → how the protagonist solves it → how the bystanders react. The reactions must come in sequence; several people can't do the same action in the same second. The details must also be realistic, for example a person's body shrinks back when surprised.
5. It must be something AI can shoot. Avoid these weaknesses: characters crossing each other, hands holding small objects, text, mirrors and reflections, left-right asymmetric features, changing light within one shot, one person doing three actions in a row, top-down shots where the face can't be seen, too many supporting characters.

If there's a song, align the twists with the chorus and the key actions with the downbeats.
By this point, your story should be just about finalized, but you still can't start the next step.
I strongly suggest at this point opening another agent to review this story again. Just say directly to Claude "open a new agent to review this story" and that's it. Remember to only give the reviewer the finalized story; don't give it any other files.
This is mainly because the main agent has already been chatting with you for a long time. It knows what you want to say, so when it reads the story it automatically fills in the gaps in its head. And the newly opened agent knows nothing, just like an audience member watching the film for the first time. Wherever it doesn't understand shows where it really wasn't explained clearly. This is very helpful for revising the plot haha.
The review steps in the later steps are the same too: give it only the story, don't give any conclusions, let it go through it once according to the requirements, and give revision conclusions.
You can use this prompt:
This is a shot-by-shot story for a short film. You are reading it for the first time, and you are only responsible for finding mistakes; don't change files.
1. Read only in shot order, and first write out the story as you understood it.
2. In order, question every twist: Why would this happen? Where does the thing come from? Can it be reached? Would this really happen in reality?
3. Can it say clearly in one sentence what it wants to express?
4. Does the opening grab people? Is the most eye-catching picture put at the front?
5. Are the bystanders' reactions like real people? Do they come in sequence?
6. Which shots are AI video models likely to get wrong? (characters crossing each other, hands holding small objects, text, mirrors and reflections, left-right asymmetric features, changing light within one shot, one person doing three actions in a row, top-down shots where the face can't be seen, too many supporting characters)
For each item write: shot, problem, suggested fix. Write "maybe" if you're not sure. At the end write "pass" or "fail".
Once this step is also done, the step of writing the complete plot can be completely finalized.
2. Storyboard: Set the Camera Language, Composition, and Color Scheme
This is the most important step of all the pre-production work, because it determines the quality of this video. I even think composition and color scheme are more important than the plot.
No matter how good the story is, if the shots aren't designed well, the picture is very flat.
But, well, camera language is actually very hard for many people to describe directly in words. Push-ins, pull-outs, lateral moves, and camera placement are all very professional things. What do you do if you can't describe them clearly?
The most effective method is to find reference films. If you haven't eaten pork, surely you've at least seen a pig run!
Then let Claude watch the reference film frame by frame, let it measure things like the camera positions and the proportions of entering and exiting the frame, and then learn and imitate.
It doesn't matter if you don't have a reference film; then let claude conceive it by itself according to the requirements below.
But every shot must be written clearly: shot size, camera position, camera movement, who walks where (write screen left/right), what expression drives it forward, how it transitions to the next shot.
For details, you can refer to the requirements below:
2.1. Change the angle every shot
My experience is that eye-level frontal shots appear at most twice in the whole film; for the rest, use camera positions like high angle, low angle, from behind, over the shoulder, and shooting through things.
The more camera positions, the richer the picture.
2.2. There must always be something moving in the picture
If in a shot the person stands still and things don't move either, it looks to the audience like they're looking at a picture,
This is what I mean by the picture being dead.
So in most shots, it's best to have a person or thing walk in from outside the frame, or walk out from inside the frame. This requires designing clearly how the people walk in each shot.
If the person in this shot just doesn't walk around, for example this shot is designed for him to sit the whole time, then make other things move, such as a piece of paper drifting past, or a passerby walking behind him.
There's also a situation where the camera doesn't move from start to finish; this is called a fixed camera position.
But I think a fixed camera position is very hard to use. If it's not used well, the picture very easily becomes stiff, so it's even more necessary to have people walk around in the picture, for example walking from far to near.
Also, don't have several consecutive shots that are all the same picture size, for example several in a row all shooting the full body. Full body, half body, and facial close-ups should all be alternated.
2.3. Every shot must write clearly what specifically is moving
Before writing each shot, first ask yourself: what exactly is moving in this shot? It can be the camera moving, it can be the focus switching from one person to another, it can be the light changing, it can also be something drifting in front of the lens, or just a small action of the character, like a hand trembling.
There must be at least one of these. If you can't write a single one, it means this shot hasn't been thought through yet and needs to be reconceived.
But it's also not the more movement the better; the whole film constantly shaking and constantly moving doesn't work either.
Move where it should move, be still where it should be still, and that way there's contrast.
2.4. Camera movement must have a reason; don't move just for the sake of moving.
When the camera moves, it must be because there's something it wants to show the audience. The three most commonly used are:
The first is following a thing or a character as it goes, for example wherever a letter flies, the camera follows it there.
The second is slowly pushing in for a close-up.
The third is shooting very close at the start, then slowly pulling back, from near to far.
2.5. Every second's screenshot must look good
If the film stops at any second, the screenshot taken should look good.
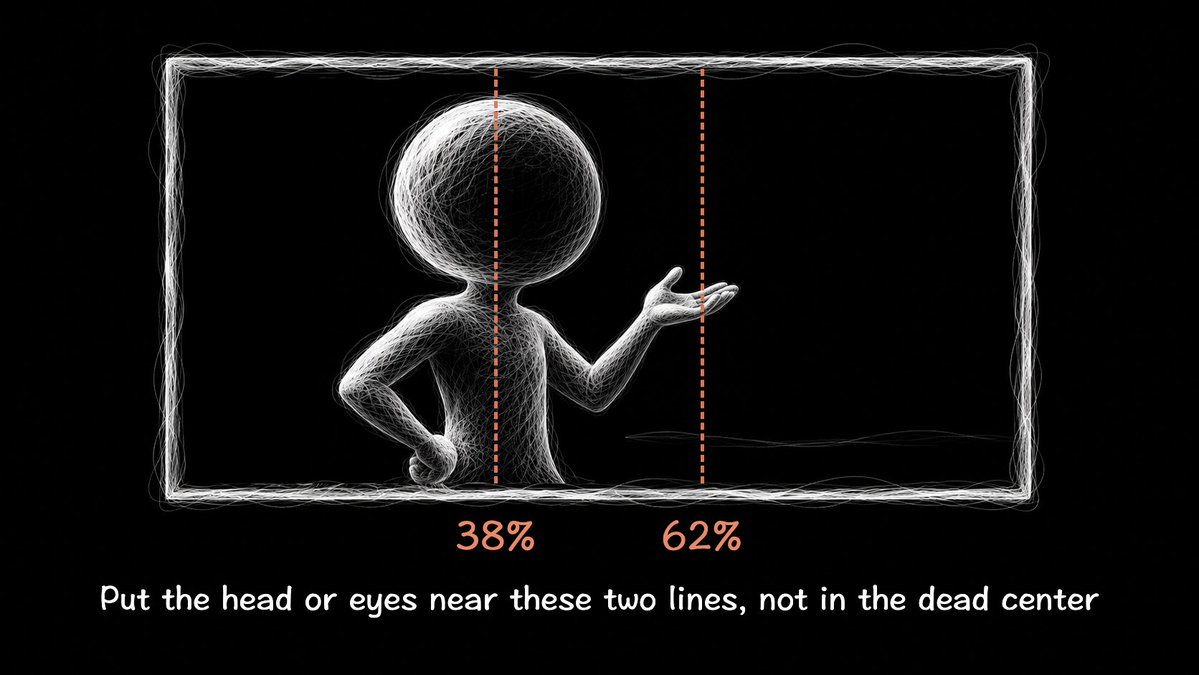
The simplest method is to use the golden ratio composition method. Put simply, well, it's to have the person's head or eyes land at about 38% or 62% of the frame from left to right, rather than in the dead center of the frame. If you don't understand it, that's fine too; just tell your AI to use golden ratio composition as much as possible.
2.6. The color scheme should be designed separately
Don't leave the color scheme to the model to improvise; it should be settled before drawing the first image.
Here just go by your own preferences.
Here's a little trick: after designing the color scheme, be sure to have Claude list what colors each scene uses separately as a color chart.
Finally, convert the picture to black and white and have claude look it over once. If after converting to black and white the person and the background can't be distinguished, it means the light-dark contrast isn't obvious, and at this point you need to readjust the color scheme.
I've also organized these requirements into a prompt:
Write the finalized story into a storyboard table. One row per shot, writing clearly: time in the film (count by bars if there's a song), generation seconds (round the in-film duration up, and leave an extra 0.5 seconds where possible), shot size, camera position, camera movement, who walks where (write screen left/right), what expression drives it forward, what is moving in this shot, and how it transitions to the next shot.

If there's a reference film, first watch the reference film frame by frame, measure things like the camera positions and the proportions of entering and exiting the frame, and then learn and imitate. If there's no reference film, conceive it yourself according to the requirements below.

Requirements:
1. Change the angle every shot. Eye-level frontal shots at most twice in the whole film; for the rest use high angle, low angle, from behind, over the shoulder, shooting through things.
2. There must always be something moving in the picture. Most shots should have a person or thing walk into the frame or walk out of the frame. For shots where the person doesn't walk around, make other things move, such as a piece of paper drifting past, or a passerby walking behind. With a fixed camera position it's even more necessary to have people walk around in the picture, for example walking from far to near.
3. Don't have several consecutive shots that are all the same picture size; full body, half body, and facial close-ups should be alternated.
4. Every shot must write clearly what is moving: the camera, the focus, the light, something drifting in front of the lens, or a small action of the character; there must be at least one. Also don't keep moving all the time; move where it should move, be still where it should be still.
5. Camera movement must have a reason: following a thing as it goes, slowly pushing in for a close-up, or slowly pulling back from near.
6. Every second's screenshot must look good. The person's head or eyes land at about 38% or 62% of the frame from left to right, not in the dead center.

The color scheme should be designed separately and settled before drawing the first image. The color scheme I want: [my preferences; if I haven't decided, give me a few options to choose from].
List what colors each scene uses separately as a color chart.

Finally, use code to draw a 1920×1080 color-block sketch for each shot, marking the 38% and 62% positions and the main things, and stitch them into one overview sheet for me to confirm. Then convert the sketches to black and white and look them over once; if the person and the background can't be distinguished, it means the light-dark contrast isn't obvious, and the color scheme needs readjusting.
3. Settle the Art Style, Draw the Design Sheets
After the storyboard is settled, next is to settle the art style.
The art style is the painting style of this animation. For example, Hayao Miyazaki's animation is the hand-drawn, soft, warm-colored kind.
There's also the style with simple lines, like paper-cut, or the realistic art style, which looks more like a real photo, and then there's the American animation kind, with a hand-drawn line feel.
For this it's still best to have reference images; just send them to the ai.
In this step Claude is responsible for writing the prompts, Codex is responsible for drawing, and we ourselves are just responsible for checking whether it's the style we want.
After the art style is settled, then draw a design sheet for each character and each fixed prop.
Generally it's this person's front, side, and a few expressions. This step is equivalent to settling his appearance.
For fixed things on a character, the position must be written clearly, for example the tattoo is on the left arm, otherwise later the tattoo position might be different in every image.
4. Make the First and Last Frame Images for Each Video Clip
After the art style and the design sheets are both confirmed, you can start drawing the first and last frames of each shot.
The first and last frames are the first picture and the last picture of this shot.
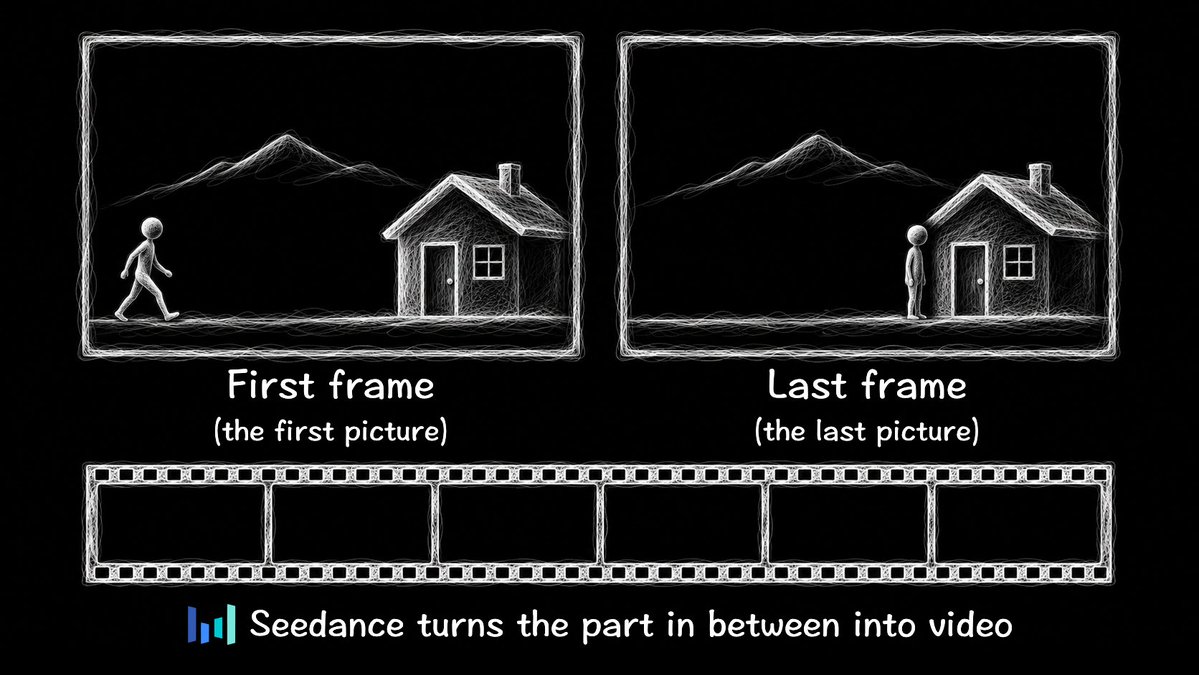
This is the most crucial step for lowering the re-roll rate.
Because if you only rely on text to generate video, the model very easily makes logic errors.
And some things, like rain, hats, and tattoos, simply don't work if only written in the text; they often disappear partway through the shot, so these small items must be drawn in both the first frame and the last frame to be safe.
When drawing, follow this order:
-
Don't start drawing right away. Have the AI write out what to draw in each shot's first frame, what to draw in the last frame, and what happens in between, and have the review agent approve it before drawing. This saves a lot of Codex credits. (One very ridiculous thing is that ever since openai merged the credits, I feel I can't generate many images before I run out of credits)
-
First draw the one with the most content, usually the last frame, then modify the last frame to get the first frame. This guarantees that the camera position and composition of the two images are the same.
-
For shots of the same location and the same camera position, modify directly on the previous image; there's no need to redraw. codex supports partial edits of images.
-
If the shot's movement is set to slowly push in, the last frame can directly be a piece cropped out of the first frame and enlarged. Because if the composition of the first frame and the last frame is exactly the same, then this shot is equivalent to not moving, and when generating the video there will be no slow push-in effect.
-
The images Codex produces are not necessarily exactly 16:9. Check them once before submitting to Seedance; if there's a problem, have the ai crop them in advance. The size of the first frame and the last frame must also stay the same.
There are also these places that are very error-prone; after drawing, also have the ai check them once. I've organized it into a prompt; send it to the AI and have it check accordingly:
The first and last frames are drawn. Help me check them item by item according to the following, zooming in on every image. If there's a problem, tell me which image and what's wrong, and only change it after I agree.
Materials: [first frame], [last frame], [design sheet], [this shot's storyboard]

1. Things that the action will use must be in the first frame. For example, if a cup is picked up later, the cup must be visible in the first frame, otherwise the cup will pop up out of thin air.
2. Other people's reactions must be set up in advance. One video clip is one shot; there's no way to cut over to film someone else midway, so the first frame must be arranged: one person doing something in front, another person behind, face toward the camera.
3. When many people appear together, they can't strike the same pose, otherwise the model will make everyone move at the same time.
4. Leave room for the action. The places where things will land or drift to must be cleared in advance, and leave some space above people's heads too.
5. The direction the wind blows must be consistent; a scarf can't drift left while a bedsheet drifts right.
6. Shrink it to phone size and look once; if the people in the distance are too small to see clearly, change it.
7. Zoom in to see if there's anything extra, such as an extra kettle, or an extra strange thin line.
8. Overlay the first frame and the last frame to see if anything is misaligned. Places that shouldn't change must be the same in both images. For example, if the wall color is different, the wall will slowly change color in the video; if the cup is a bit bigger, the cup will slowly get bigger in the video.

When changing images, pay attention to two points:
- Even if Codex only changes a small piece, it will reprocess the whole image. So when only changing a small piece, paste the changed piece back onto the original image.
- When Codex's credits run out, wait for them to recover; don't buy credits, and don't draw too many images at the same time.
5. Write Video Prompts, Review Before Submitting
After the first and last frames are drawn, you can write the video prompts.
Before, every time I ran into problems in the generated picture, I thought the video model wasn't good enough, but later I found that a lot of the time it was a problem with the prompt.
So when problems come up, first suspect the prompt, and then suspect the model. Of course, suspecting doesn't do any good either; you still have to honestly reshoot, but no matter what, the prompt must be written in fine detail.
Here I strongly recommend always using a seven-part prompt, writing down what happens in every second:
【Art style】[one sentence on the art style, for example: clean modern 2D hand-drawn animation, flat color blocks, crisp lines, no grain or texture]. The art style, colors, and character design of the whole clip are completely consistent with the first frame and the last frame.
【Camera】The whole clip is [X] seconds, [shot size], [camera position], [camera movement; if it doesn't move write "no push, no pull, no pan, no cuts"].
【Composition and color】[where the people and things are in the frame, what color the walls and the light are. Must match the first frame]
【Characters】[each person's appearance, clothes, fixed props, spelled out exactly]
【Second by second】
0–0.2 seconds: The picture is completely still, exactly the same as the first frame.
[each segment: who does what, how the expression changes, where the hands are and what they can't touch, toward which side of the frame]
Last 0.3 seconds: Everyone stops completely, and the picture is completely consistent with the last frame.
【Sound】Only [sounds whose cause can be seen]. The characters don't speak.
【Constraints】The picture always has only these few people and these things from the first frame, faces and body shapes stay unchanged throughout, one continuous take. The picture is clean, with no text, subtitles, or watermarks.
The table below is the mistakes the model most easily makes, and the useful ways of writing I've tried. When writing prompts you can check against it:
| Mistakes the model easily makes | How it should be written |
|---|---|
| A group of people doing the same action at the same time | Write clearly who goes first and who goes later: "Dad first……one or two seconds later the old lady……the little girl last……", and also don't put them in the same pose in the first frame |
| Something the wind was supposed to do, a person did by hand, for example the mailman opening the mailbag with his hand | Write the reason clearly, then add "both hands never touch the mailbag from start to finish" |
| Clouds, the moon, and plants grow eyes and mouths | Don't write "cartoon clouds"; write "fluffy grey-white cumulus clouds, with only cotton-like texture and shadows", and for actions only write how it moves |
| People walk in the opposite direction | Write directions according to the frame: "walking toward the left of the frame, crossing the shop door on the left" |
| One sentence has two meanings, for example writing "the old man behind the window", and a person popped out of the car | Write it more specifically: "in the window of the stone house in the upper left corner", then add "the driver's seat stays empty the whole time" |
| The number of things changed | Write the number directly: "only one yellow envelope, after that his arms are full of white envelopes" |
| Writing "don't do such-and-such" often doesn't work, for example writing "no water comes out of the spout" and water still comes out | Try to change it to a positive phrasing: "the picture always has only these few people from the first frame" |
| The model will associate uses for props by itself, for example a kettle always pours water | Simply don't let this prop appear in shots with action |
| Things appear out of thin air | Only use things already in the first frame |
| Things suddenly fly away or teleport | Write clearly how it moves: "slides backward along the back of the head, caught, put back on the head" |
| Rain, hats, and tattoos disappear partway through the shot | Draw them in both the first frame and the last frame |
| Lightning is drawn too realistically | Write "a flash of white light in the clouds", then cut off the beginning |
| Too many actions in one shot and it gets messy | Write only one or two main actions per shot |
| The timing of the actions differs from what was written | Written times only count as approximate; leave a bit of extra time, and later match the beat with editing and speed changes in post |
| The camera push isn't as obvious as written | In post have Claude push a bit more with code |
| People's mouths move on their own | Write clearly "the characters don't speak"; if it still moves, fix it with code |
| Wrote "no music" and music still got mixed in (Seedance 2.5) | Don't use the clip's built-in sound; add it separately in post |
| The last few frames suddenly jump to the look of the last frame (Seedance 2.5) | In post pick a picture with no problems, and hold on this one for everything after |
| The first picture is especially sharp (Seedance 2.5) | Just remove this one |
| The video gets darker and colder toward the end (Seedance 2.0 mini) | Grade each video's color back according to its own first frame |
Another method I often use is: before each video is submitted, you must open another agent and check every detail of the prompt and the images once. Only after it passes review can it be submitted to seedance.
This step is very useful. Using this method has helped me catch many problems, for example the cup size in the two images differed by 13%, the hat brim was in one image and not in the other, and left and right were written backwards.
This is also the reason my re-roll rate is extremely low.
The pre-submission review prompt; open a new agent and send it this:
You are the reviewer; read only, don't change anything. This shot is about to be submitted for video generation, and it costs real money.
Materials: [prompt file], [first frame], [last frame], [design sheet], [storyboard table], [color scheme rules].
Check item by item, zooming in on the images:
1. Does every sentence of the prompt match the two images? (position, left/right, color, number of people, number of props, clothes, expressions)
2. Are the camera position, size, and background of the two images consistent?
3. Does it match the design sheet, the color scheme rules, and the shots before and after?
4. Are the actions realistic? Is the reason for each action written? Where are the hands?
5. Where might the model go wrong? (simultaneous actions, appearing out of thin air, growing faces, walking in the wrong direction, ambiguous words)
At the end write only "pass" or "fail". If it fails, list item by item what needs changing.
6. Generate the Videos
This step is very simple; it's all done automatically by the ai, and we don't need to manage it.
But there are some money-saving tips you can send to your ai:
-
Generate at 720p, then upscale to 1080p in post.
-
No need to specially shoot a test clip; directly shoot the first official shot, and if it's usable that's a win.
-
For a new approach, first try it with one or two of the hardest shots, and if it works then submit them all.
-
Think clearly about whether to use Seedance 2.5. Its price is about 3 times that of 2.0 mini; if the budget is tight, use 2.0 mini. (I feel that as long as it's not an especially complex shot that really tests the model's ability, using 2.0mini is quite enough)
-
Listen to the sound before using it. The sound effects that come with 2.0 mini can often be used directly. With 2.5, even if you write "no music", sometimes music still gets mixed in; in that case don't use it, and sound effects can be added separately in post.
When you find a problem, don't reshoot right away either, because reshooting costs money again. You can see whether it can be handled from the following aspects:
-
Can it be cut? If the problem only appears in those few frames at the beginning or the end, just cut them.
-
Can it be fixed with code? Let Claude try writing code to fix it; if it can't be fixed, then consider reshooting.
-
If you need to reshoot, first change the prompt or the first and last frame images, otherwise shooting again as-is will most likely still be wrong. After reshooting, don't delete the old clip either. The reshot new clip isn't necessarily better than the old one; keep them all, and finally put them together and pick. They were all shot with money, so if they're usable, use them all.
7. Stitching, Transitions, Color Grading, Upscaling
Since our video is generated clip by clip, after generation is done you need to start stitching each clip together and generate the complete video, then add transitions, color grading, upscaling and so on.
I suggest doing all of it with code; just let Claude do it.
These are likewise organized into a prompt; send it to the ai:
Do post-production with code:
1. Transitions: [which shot to which shot, what thing covers the screen or carries it over]. Split motion blur into 8–16 slices, half-frame shutter.
2. Color grading: by story segment. Only adjust saturation and brightness, don't touch hue, protect the accent colors, keep skin tones unchanged. Don't add grain, soft glow, or vignette.
3. Decode Seedance's mp4 as BT.601, use lossless formats for intermediate files, and tag deliverables as BT.709.
4. Upscaling: upscale 720p to 1080p with lanczos, and add light sharpening. Don't use frame interpolation on whole clips.
5. Cut to the bars: measure the beat points only from the original song, not on edited files.
When done, spot-check 3 frames before and after each cut point.
8. Full-Film Review and Delivery
This step, well, is to open another new review agent, give it only the finished film, don't tell it any conclusions, and let it watch it from start to finish like an audience member.
Then have the AI write a summary, saving the art style, the prompts, and the mistakes made, that is, to let the experience from every time you make a video settle and build up.
The full-film review prompt; open a new agent and send it this:
This is the finished film: [file]. You are watching it for the first time, and I won't tell you any conclusions.
1. Decode all of it, take multiple full-resolution frames per shot, and take 3 frames each before and after each cut point.
2. First write the story as you understood it, then list the parts you didn't understand.
3. Check shot by shot: repeated actions, number of props, continuity errors, sudden jumps, color jumps, face deformation, text problems.
4. State clearly the things you can't check (feel of the motion, sound).
For each item write: time, frame number, problem. Divide them into "serious flaws" and "minor problems".
Finally, Let Me Also Share My Four-Thread Work Mode
This is mainly for claude or codex, that is, the director.
Simply put, it's opening four agents to work together so Claude does the director's job well.
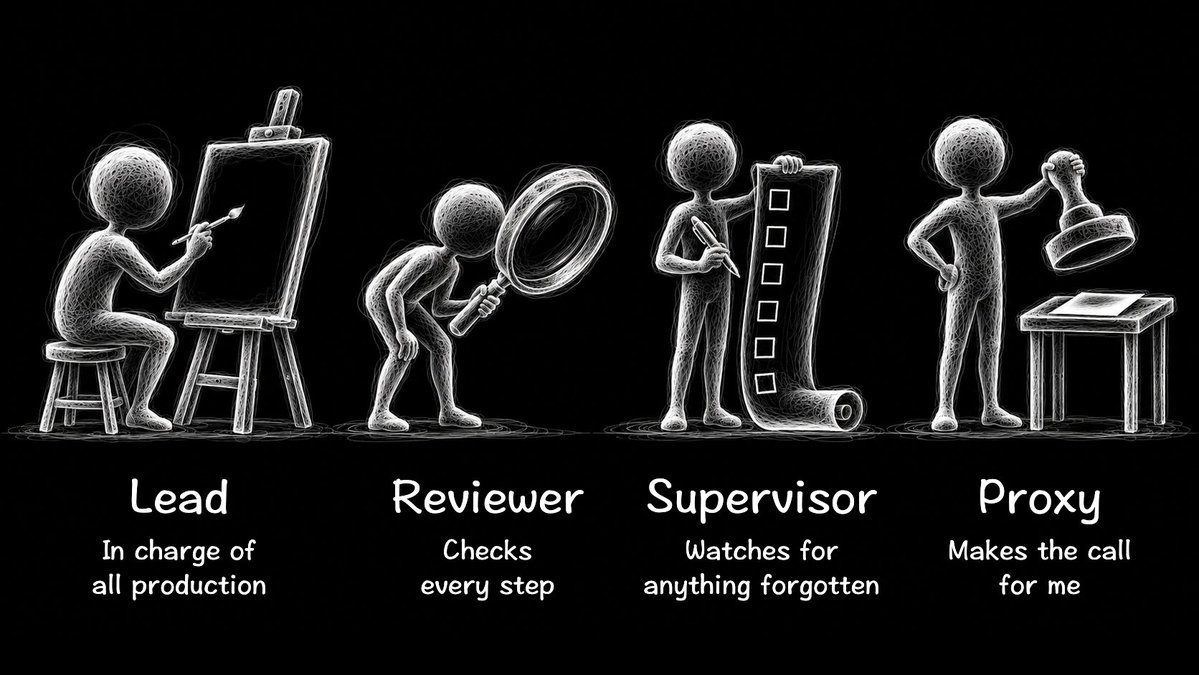
They are the following 4:
| Role | Responsible for what |
|---|---|
| Lead | Responsible for all production |
| Reviewer | Checks every step; must write "pass" before submitting to generate video |
| Supervisor | Lists everything I've said as a checklist, and watches whether anyone has forgotten |
| Proxy | Makes decisions for me according to my usual choices, and approves submissions within the budget I agreed to in advance |
The other three agents are all sub-agents that Claude opens itself; you just need to send it the prompt below.
The four-thread prompt:
This film will be made with four threads. You are the lead; open three more sub-agents, and the four work together, all the way until the film is finished, or until the account runs out of funds.
What I've said is at: [path to the conversation log or the requirements file; Claude Code's logs are under ~/.claude/projects/].
Total budget: ¥[amount].

Division of labor:
- Lead: that's you, responsible for all production.
- Reviewer: open a sub-agent that only finds mistakes and doesn't change files. Check every step, and before submitting to generate video it must explicitly write "pass".
- Supervisor: open a sub-agent, read everything I've said, and organize it into a requirements checklist. At every step check whether anyone has forgotten a requirement, including you.
- Proxy: open a sub-agent, read everything I've said, and organize it into my preferences. When you and the reviewer aren't sure, or when submitting to generate video, it decides according to my preferences, and writes down the basis and its confidence. It can only approve submissions within the total budget; if it's over budget, stop and wait for me.

Order of cooperation:
1. Every time you finish a step, first give it to the reviewer, then give it to the supervisor.
2. If there's disagreement, give it to the proxy to decide.
3. Record all decisions and spending in the review log; when I come back I can overturn any decision.

Don't top up, don't buy credits. If the account runs out of funds, stop, and first make a rough cut of the existing clips for me to watch.
Finally, I think making videos is a very interesting thing,
but how to make a film well is actually very hard,
I'm also always learning, and I hope this article is useful to you.
I'm Eian, thanks for your support!
沿着这个主题继续读
从一篇文章,找到相关的教程、经验和阅读路径。